Posted on

Polymer Clay Too Soft, Sticky, or Impossible to Work With?

If your polymer clay feels like chewing gum, sticks to everything, or turns into a floppy mess the second you touch it, you’re not doing anything “wrong.”

You’ve just hit one of the most common beginner frustrations.

The good news is, this is very fixable. The better news is, once you understand why it’s happening, you’ll avoid it completely going forward.

First, let’s diagnose the problem

Polymer clay issues usually fall into one of three categories:

1. Too soft

  • Won’t hold its shape
  • Smears when you touch it
  • Edges collapse or go wobbly

2. Too sticky

  • Sticks to your hands, tools, or work surface
  • Picks up fluff, dust, and every questionable life decision on your desk
  • Leaves residue behind

3. Impossible to work with

  • Either too soft or weirdly inconsistent
  • Tears, stretches, or just refuses to behave

Now let’s fix it.

The real reasons this happens

You’re using a soft clay brand (or mixing unknowingly)

Some polymer clay brands are naturally softer. Great for kids. Not always great for detail.

If your clay feels like it melts the second you touch it, that’s likely the issue.

👉 Fix:

  • Mix it with a firmer clay
  • Or let it sit for a bit before using (more on that below)

Your hands are warming it up too much

Polymer clay softens with heat. And unfortunately, your hands are basically portable heaters.

If you’re conditioning it for ages or overhandling it, it will turn into a sticky mess.

👉 Fix:

  • Work in shorter bursts
  • Let the clay rest for 5 to 10 minutes
  • If it’s really bad, pop it in the fridge for a few minutes

You’ve over-conditioned it

Yes, that’s a thing.

Conditioning is good. Over-conditioning turns your clay into something that behaves like frosting instead of… well, clay.

👉 Fix:

  • Stop kneading once it’s smooth
  • If it’s already too soft, you can firm it back up (next section)

Your environment is working against you

Warm room, direct sunlight, hot hands, summer in Australia… it all adds up.

👉 Fix:

  • Work in a cooler space
  • Avoid direct sunlight
  • Use a tile or glass surface instead of wood

You’re working on the wrong surface

Some surfaces make stickiness worse.

👉 Fix:

  • Best options: ceramic tile, glass, baking paper
  • Avoid: raw wood, textured plastic, anything slightly porous

How to fix soft or sticky clay immediately

This is the part you actually care about.

1. Let it rest (simple but underrated)

Roll your clay into a ball and leave it alone for 10 to 20 minutes.

It will firm up naturally as it cools.


2. Leach out excess plasticiser

If your clay is really soft, this is the fix.

👉 How to do it:

  • Flatten the clay
  • Place it between two sheets of plain paper
  • Leave it for 30 minutes to a few hours

The paper absorbs excess oils, making the clay firmer and easier to control.


3. Chill it (quick fix)

Pop your clay in the fridge for 5 to 10 minutes.

Not the freezer, you’re making jewellery, not preserving leftovers.


4. Dust lightly if needed

If it’s sticking while you work:

  • Use a tiny amount of cornflour or baby powder
  • Apply lightly, not like you’re seasoning chips

5. Stop touching it so much

This one’s blunt, but accurate.

The more you handle it, the worse it gets.

👉 Work smarter:

    • Shape it, then leave it
    • Use tools where possible
    • Don’t keep reworking the same piece

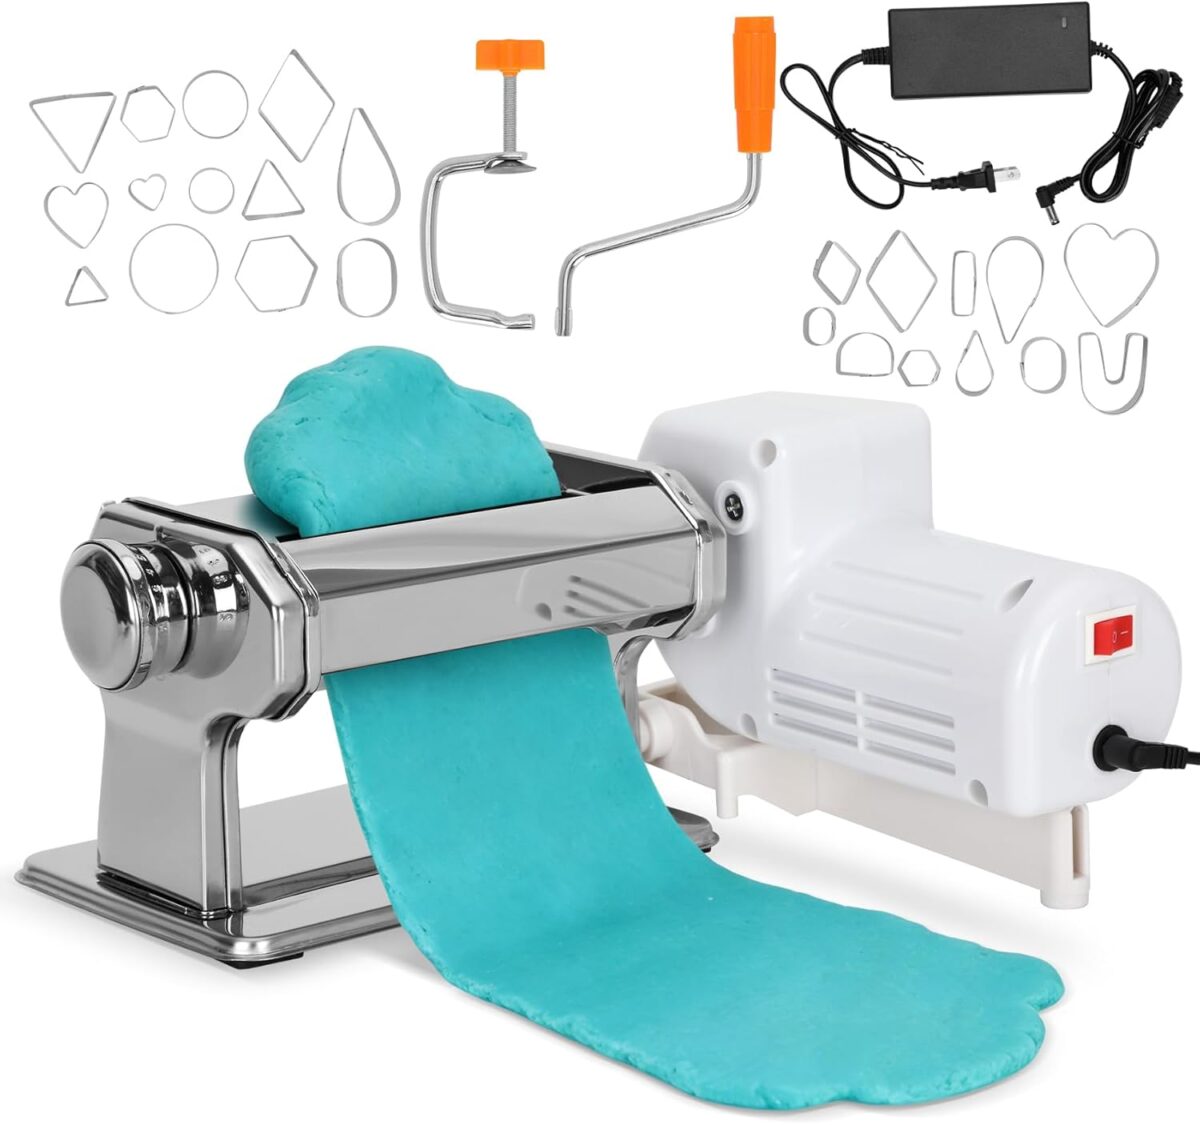
If I was starting out new

I'd be all over this machine. I purchased a motor for around $250 for my Atlas and the motor lasted all of 2 months. With this you get the pasta machine and the motor for $79US. The reviews are good too plus it has 9 thickness levels up to 3mm.

Bonus: how to prevent it next time

Once you fix it, here’s how to avoid the issue entirely:

  • Don’t over-condition
  • Work in a cool space
  • Use a proper surface
  • Mix soft clay with firmer clay if needed
  • Take breaks instead of fighting the clay

The bottom line

If your polymer clay is too soft or sticky, it’s not a skill issue.

It’s usually:

  • Temperature
  • Overworking
  • Or the clay itself

Fix those, and suddenly everything becomes easier, cleaner, and far less rage-inducing.


What to try next

Once your clay is behaving again, this is the perfect time to experiment with simple techniques that don’t require perfect control.

Start here:
👉 The easiest ways to add texture (even with random household items)

Posted on

Polymer Clay: The Easiest Way to Add Texture (Even if You Have No Tools)

Let’s be real, polymer clay tools are cute, but they’re not exactly essential when you’re just starting out. In fact, some of my favourite textures didn’t come from a craft store. They came from my kitchen drawer, my sock basket, and a rogue leaf I found on the footpath.

If I’m honest, those days were probably the most fun because I was “playing” and “experimenting” without worry. It was really fun to see what I could come up with.

Even now I quite often save random bits of plastic, like the trays meat comes on. Some have circles, some diamond shapes and depending on which way up it is, you have an inverted design too.

So if you’re thinking you need to drop fifty bucks on texture rollers, stamps, and mats… hold up. I’ve got you covered with easy ways to add beautiful texture to your clay, using things you probably already have at home.

But First, Why Add Texture?

Adding texture to polymer clay does three things:

  • It makes your pieces look more detailed and professional (even if you’re winging it).
  • It adds visual interest, especially if you’re working with plain colours.
  • It’s ridiculously satisfying.
  • If added to the back of a piece, it helps hide imperfections and lessens sanding.

Whether you’re making earrings, beads, or trinket dishes, a little texture can make your piece go from “cute” to “hold up, you made that?!”

Texturing with Household Items

Here’s a list of everyday bits and bobs that leave gorgeous impressions in clay. Bonus: they’re cheap, easy to clean, and fun to experiment with.

1. Lace, Netting, and Fabric

  • Dig through your wardrobe or junk drawer, lace scraps, fishnet tights, mesh produce bags, or even grippy shelf liners work like magic.
  • Press gently into conditioned clay with your roller or fingers.
  • Lift carefully for a gorgeous repeat pattern.

Try: old doilies, curtain off cuts, or even the rubber soles of your shoes (seriously).

2. Leaves and Plants

  • Use flat leaves, herbs, ferns, or flowers to imprint delicate, organic textures.
  • Fresh is best, dried leaves can crumble and make a mess.
  • Press with your roller, then bake the clay with the leaf on top for a fossil-like effect (optional).

Local park walk = free craft supplies.

3. Bottle Caps, Buttons, and Utensils

  • Bottle caps make perfect circle stamps, and the underside often has a ridged texture.
  • Forks, knives, or the back of a spoon are great for line work or creating faux metal details.
  • Buttons (especially vintage ones) often have little embossed patterns that transfer beautifully.

Pro tip: raid your kitchen and your sewing box.

4. Patterned Dishes and Tiles

  • Ceramic plates, mugs, or bowls with embossed details? Press those into your clay.
  • You’ll get subtle, classy texture that looks way fancier than it actually is.
  • Try the base of a teacup or a vintage plate for a surprise pattern.

Just make sure it’s clean before pressing it into your clay.

5. Paper and Cardboard

  • Try pressing textured card stock, corrugated cardboard, or even embossed wrapping paper into clay.
  • Use sandpaper for a fine texture.
  • Works best on slightly firmer clay, too soft and it might stick.
  • You can even cut custom shapes from cardboard to stamp your own designs.

Don’t throw out that Amazon box just yet.

6. Completely random items

  • String/twine
  • Paper clips
  • Pen/texta lids
  • Screws, bolts, nails, anything from the tool box really.
  • Small cane baskets
  • Toys and action figures
  • Beads
  • Mini figurines
  • Meat trays / food packaging
  • Scrunched up tin foil
  • Old toothbrush
  • Comb

Hopefully your brain is now buzzing with ideas and you will look at EVERY item and wonder how it can be used. 

Bonus: Make your own

  • Roll out your scrap clay into at least 3mm thick square slabs and texture it.
  • Bake in the oven as per usual
  • Dust some cornstarch or use water as a release on a slab of raw clay and press your home made texture stamp into it.

Clean-Up Tips

  • Wipe tools and textures with a baby wipe or damp cloth right after use.
  • Clay gets into every crevice, so don’t use anything you can’t clean.
  • Keep a stash of texture-only household items if you fall in love with this technique. (I still have all of mine in a container from 10 years ago, hmm I really should revisit it)

What to Avoid

  • Paper towels or tissue, tempting, but they usually leave annoying fuzz.
  • Food containers with oils or dyes, stains happen.
  • Anything fragile that might snap, splinter, or disintegrate when pressed.

Want to Get Fancy Later?

Once you’re hooked (trust me, it’ll happen), you can totally branch out into:

But don’t rush, start with what you’ve got, learn what textures you like, and grow from there.

Final Thoughts (From One Texture Addict to Another)

There’s something extra magical about finding texture in unexpected places. Your art feels more personal, more inventive, and honestly? It’s just more fun this way.

So go on, grab that fork, press that leaf, and see what kind of gorgeous weirdness you can create. You don’t need all the tools. You’ve got imagination, a bit of clay, and a slightly concerning collection of bottle caps. That’s enough.

Posted on

Polymer Clay for Beginners, What You Actually Need to Get Started (Without Wasting Money)

Polymer Clay for Beginners

So, you’ve fallen down the polymer clay rabbit hole, haven’t you? Maybe you saw a cute pair of handmade earrings on Etsy, or one of those oddly satisfying Instagram reels where someone slices perfect little rainbow canes. Now you’re wondering, “Do I need fifty tools? A pasta machine? A tiny oven? My own studio?”

Breathe. You really don’t.

I’ve been through it. I’ve panic-bought the tool sets. I’ve watched tutorials and rushed out and bought all the extras. I’ve ruined clay in ovens that were too hot, too cold, or just possessed. I’ve baked lint right into my projects. It’s all part of the journey. But I can save you some time (and a bit of cash) by telling you exactly what you need to get started with polymer clay—and what you absolutely, definitely don’t.

Let’s build your starter kit the easy way.

The Clay

Alright, first things first. You need actual clay. Mind-blowing, I know.

Start with:

Sculpey Premo – Firm, holds detail well, lots of colour options

Avoid the ultra-cheap stuff you find in bargain bins or discount stores. It’s often crumbly, sticky or just straight-up garbage. Stick to known brands at the start.

Tip: Grab a multipack so you can play with a few colours and find what feels good.

The Tools (You Only Need a Few, Promise)

There are hundreds of tools out there, and 90 percent of them will sit in your drawer collecting dust. Here’s what you’ll actually use:

Clay Blade

Get a simple 3-pack with straight, flexible and rigid blades

You’ll use these every single session

Acrylic Roller

Perfect for flattening and conditioning clay

If you have a clean glass jar at home, that’ll do for now

Needle or Dotting Tool

Great for poking holes and adding little details

Can be subbed with a toothpick, pin, or the tip of a mechanical pencil if you’re scrappy

Baby Wipes or Cornstarch

To keep fingerprints off your clay

You’ll thank me later

Baking Setup
Don’t overthink this. You do not need a separate oven (unless you’re fancy).

What you’ll need:

  • A baking tray
  • A ceramic tile or sheet of baking paper
  • An oven thermometer – this one is non-negotiable. Most ovens lie. Clay can burn or underbake if your temp is off

Follow the package instructions, but always use a thermometer to check.

Tip: I bake my pieces for 1 hour from a cold oven and usually a tiny bit higher of a temp than the package says. I also bake in my regular home oven. I’ve had multiple types of mini ovens just for clay and find the temp fluctuates too much. I’ve even used my air fryer for small pieces as a test, it worked!!

Finishing Touches

Want your pieces to look professional? You’ll want to tidy them up a bit after baking.

Sanding Tools

  • Fine grit wet dry sand paper (400 to 2000 grit)
  • Buffing tool (optional, but makes your work shiny and smooth)
  • Sealing (Only if needed)

For glitter or mica powders, you may want a varnish or UV resin. Resin is a whole other world that comes with more craft supplies so stick with a regular sealer for now. I love Jo Sonja gloss glaze from Spotlight but any Polyurethane Gloss will do the trick. 

Storage & Setup

You don’t need a craft room. I work on a fold-out table most days. I used to have a whole garage craft studio and I do miss it but if you store things correctly, you dont need a lot of space. When i started out I kept everything in a storage tub, then 2 tubs, 3 tubs….

Keep clay in ziplock bags or airtight containers. (not all plastics are polymer clay friendly, more about that down further)

Organise tools in a pencil case, drawer tray or makeup bag

Use a tile for a work surface, and store it away when done

I actually use a bunch of storage bits from Temu, Aldi and Amazon, because they’re cheap and cute and functional (the dream combo).

What You Don’t Need (Yet)

Let me save you a little heartache. You don’t need:

  • A pasta machine (wait and see if you like using polymer clay first)
  • 70 different cutters or molds
  • Fancy sculpting tools (unless you’re doing miniatures or serious sculpting)
  • Ten shades of glitter clay (you’ll get distracted and never use most of them)
  • Mica powders, Alcohol inks, glitter and any other inclusions.

Keep it simple. Get comfy with the basics first, then grow from there. 

Shop My Beginner Kit

Here’s a peek at the actual supplies I’d recommend to anyone starting fresh. These are the things I still use regularly—nothing fluffy, all useful.

I buy a lot of supplies from temu, it really helps lower the cost.  You can browse my saved items/store front here. These are items I have actually purchased and use.

Premo Clay Sampler - Amazon

Enjoy playing with smaller packs of multiple colours. If you need to, buy larger blocks of black, white, translucent and pearl as these will be your most used colours.

12 Pieces Polymer Clay Tools - Amazon

This set covers all the basics to get you started. Blades, Acrylic roller, piercing needle and Acrylic plates.

Dotting Tools - Temu

14pcs Stainless Steel Dotting Tool Set

Oven Thermometer – Temu

Clear easy to see numbers.

Wet and Dry Sandpaper - Temu

I try to avoid sanding as much as possible but sometimes its necessary and as a new clayer, you are going to need it until you perfect the art of not leaving finger prints, fluff and pet hairs in your clay 🙂

Storage Drawers – Amazon

Um so i have 8 of these, 2 have the larger plastic drawers down the sides to hold larger items. I keep all of my findings and beads in them as well as polymer clay and polymer clay canes. When I had a studio they stacked neatly against the wall, now they sit sideways in my craft wardrobe. I can easily pull them out as needed.

Tip: Sticky tape an item to the front of the drawer so you know whats inside at a glance.

Plastic Safety

Polymer clay is generally safe to use with most plastics, but some types can be damaged or melted by uncured clay. Specifically, polycarbonate and polystyrene (recycling codes 6 and 7) should be avoided as they can be melted or softened by contact with unbaked polymer clay. Other common plastics like PET, PETE, HDPE, Vinyl, PVC, LDPE, and PP (recycling codes 1, 2, 3, 4, and 5) are generally considered safe for contact with uncured polymer clay.

Final Words from a Clay Addict

Polymer clay is one of those crafts that looks complicated from the outside, but once you get your hands into it, it’s weirdly soothing. A bit messy, a bit unpredictable, but a whole lot of fun.

Don’t worry about being perfect. Just start. Slice a few pieces, squish some colours, make some lumpy earrings and show them off like they’re diamonds. We all started somewhere, and you’re already miles ahead just by showing up.

And hey, if you found this helpful, share it with a fellow maker or tag me in your clay chaos—I’d love to see what you’re creating! 

♥ Kerryanne

Posted on

Why Kaboochie Uses Minimal Packaging

Fancy Packaging

If you’ve ever watched one of those dreamy “pack an order with me” videos, you’ll know how beautiful they can be — layers of tissue paper, branded stickers, hand-tied bows, confetti… the works. While it’s lovely to see, at Kaboochie, I’ve taken a slightly different approach.

My packaging is intentionally simple — and there’s a reason for that.

By keeping things minimal and fuss-free, I’m able to reduce unnecessary costs and pass those savings directly onto you. That means I can offer handmade, thoughtfully crafted jewellery at accessible prices, without inflating the cost to cover elaborate packaging materials.

Each order is still packed with care and attention — clean, protective, and functional — ensuring your pieces arrive safely and in great condition. I choose packaging that’s practical, low-waste, and recyclable wherever possible, because I believe that what’s inside the parcel matters most.

At the heart of Kaboochie is a love for quality, creativity, and making beautiful things for everyday wear — not for showy packaging that ends up in the bin. So while you won’t find glitter-filled boxes here, you will find affordable, original pieces made with heart.

Thanks for supporting small — and for valuing substance over excess 💛