Kaboochie

Kaboochie Handmade Polymer Clay, Resin Jewellery and Gifts Bendigo Australia 

Home / Handmade Jewellery Blog / Polymer Clay for Beginners, What You Actually Need to Get Started (Without Wasting Money)

Polymer Clay for Beginners, What You Actually Need to Get Started (Without Wasting Money)

So, you’ve fallen down the polymer clay rabbit hole, haven’t you? Maybe you saw a cute pair of handmade earrings on Etsy, or one of those oddly satisfying Instagram reels where someone slices perfect little rainbow canes. Now you’re wondering, “Do I need fifty tools? A pasta machine? A tiny oven? My own studio?”

Breathe. You really don’t.

I’ve been through it. I’ve panic-bought the tool sets. I’ve watched tutorials and rushed out and bought all the extras. I’ve ruined clay in ovens that were too hot, too cold, or just possessed. I’ve baked lint right into my projects. It’s all part of the journey. But I can save you some time (and a bit of cash) by telling you exactly what you need to get started with polymer clay—and what you absolutely, definitely don’t.

Let’s build your starter kit the easy way.

The Clay

Alright, first things first. You need actual clay. Mind-blowing, I know.

Start with:

Sculpey Premo – Firm, holds detail well, lots of colour options

Avoid the ultra-cheap stuff you find in bargain bins or discount stores. It’s often crumbly, sticky or just straight-up garbage. Stick to known brands at the start.

Tip: Grab a multipack so you can play with a few colours and find what feels good.

The Tools (You Only Need a Few, Promise)

There are hundreds of tools out there, and 90 percent of them will sit in your drawer collecting dust. Here’s what you’ll actually use:

Clay Blade

Get a simple 3-pack with straight, flexible and rigid blades

You’ll use these every single session

Acrylic Roller

Perfect for flattening and conditioning clay

If you have a clean glass jar at home, that’ll do for now

Needle or Dotting Tool

Great for poking holes and adding little details

Can be subbed with a toothpick, pin, or the tip of a mechanical pencil if you’re scrappy

Baby Wipes or Cornstarch

To keep fingerprints off your clay

You’ll thank me later

Baking Setup
Don’t overthink this. You do not need a separate oven (unless you’re fancy).

What you’ll need:

  • A baking tray
  • A ceramic tile or sheet of baking paper
  • An oven thermometer – this one is non-negotiable. Most ovens lie. Clay can burn or underbake if your temp is off

Follow the package instructions, but always use a thermometer to check.

Tip: I bake my pieces for 1 hour from a cold oven and usually a tiny bit higher of a temp than the package says. I also bake in my regular home oven. I’ve had multiple types of mini ovens just for clay and find the temp fluctuates too much. I’ve even used my air fryer for small pieces as a test, it worked!!

Finishing Touches

Want your pieces to look professional? You’ll want to tidy them up a bit after baking.

Sanding Tools

  • Fine grit wet dry sand paper (400 to 2000 grit)
  • Buffing tool (optional, but makes your work shiny and smooth)
  • Sealing (Only if needed)

For glitter or mica powders, you may want a varnish or UV resin. Resin is a whole other world that comes with more craft supplies so stick with a regular sealer for now. I love Jo Sonja gloss glaze from Spotlight but any Polyurethane Gloss will do the trick. 

Storage & Setup

You don’t need a craft room. I work on a fold-out table most days. I used to have a whole garage craft studio and I do miss it but if you store things correctly, you dont need a lot of space. When i started out I kept everything in a storage tub, then 2 tubs, 3 tubs….

Keep clay in ziplock bags or airtight containers. (not all plastics are polymer clay friendly, more about that down further)

Organise tools in a pencil case, drawer tray or makeup bag

Use a tile for a work surface, and store it away when done

I actually use a bunch of storage bits from Temu, Aldi and Amazon, because they’re cheap and cute and functional (the dream combo).

What You Don’t Need (Yet)

Let me save you a little heartache. You don’t need:

  • A pasta machine (wait and see if you like using polymer clay first)
  • 70 different cutters or molds
  • Fancy sculpting tools (unless you’re doing miniatures or serious sculpting)
  • Ten shades of glitter clay (you’ll get distracted and never use most of them)
  • Mica powders, Alcohol inks, glitter and any other inclusions.

Keep it simple. Get comfy with the basics first, then grow from there. 

Shop My Beginner Kit

Here’s a peek at the actual supplies I’d recommend to anyone starting fresh. These are the things I still use regularly—nothing fluffy, all useful.

I buy a lot of supplies from temu, it really helps lower the cost.  You can browse my saved items/store front here. These are items I have actually purchased and use.

Premo Clay Sampler - Amazon

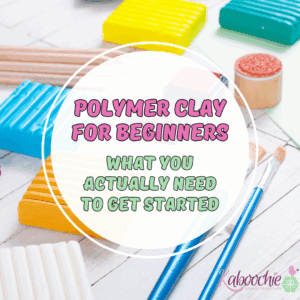
Enjoy playing with smaller packs of multiple colours. If you need to, buy larger blocks of black, white, translucent and pearl as these will be your most used colours.

12 Pieces Polymer Clay Tools - Amazon

This set covers all the basics to get you started. Blades, Acrylic roller, piercing needle and Acrylic plates.

Dotting Tools - Temu

14pcs Stainless Steel Dotting Tool Set

Oven Thermometer – Temu

Clear easy to see numbers.

Wet and Dry Sandpaper - Temu

I try to avoid sanding as much as possible but sometimes its necessary and as a new clayer, you are going to need it until you perfect the art of not leaving finger prints, fluff and pet hairs in your clay 🙂

Storage Drawers – Amazon

Um so i have 8 of these, 2 have the larger plastic drawers down the sides to hold larger items. I keep all of my findings and beads in them as well as polymer clay and polymer clay canes. When I had a studio they stacked neatly against the wall, now they sit sideways in my craft wardrobe. I can easily pull them out as needed.

Tip: Sticky tape an item to the front of the drawer so you know whats inside at a glance.

Plastic Safety

Polymer clay is generally safe to use with most plastics, but some types can be damaged or melted by uncured clay. Specifically, polycarbonate and polystyrene (recycling codes 6 and 7) should be avoided as they can be melted or softened by contact with unbaked polymer clay. Other common plastics like PET, PETE, HDPE, Vinyl, PVC, LDPE, and PP (recycling codes 1, 2, 3, 4, and 5) are generally considered safe for contact with uncured polymer clay.

Final Words from a Clay Addict

Polymer clay is one of those crafts that looks complicated from the outside, but once you get your hands into it, it’s weirdly soothing. A bit messy, a bit unpredictable, but a whole lot of fun.

Don’t worry about being perfect. Just start. Slice a few pieces, squish some colours, make some lumpy earrings and show them off like they’re diamonds. We all started somewhere, and you’re already miles ahead just by showing up.

And hey, if you found this helpful, share it with a fellow maker or tag me in your clay chaos—I’d love to see what you’re creating! 

♥ Kerryanne